Learn how to start a Ninja blender in easy steps. We’ll highlight and explain the basics of setting up your blender and provide some handy tips you can always use to get the most out of it.
Using a Ninja Blender is a great way to make smoothies, shakes, and other delicious recipes. But before you can enjoy the deliciousness, you’ll need to set up your Ninja Blender. Read on for an easy step-by-step guide to starting a Ninja Blender.
How to Start a Ninja Blender: Step By Step
Congratulations on getting your new ninja blender. Your next challenge is starting and running it. These blenders are available in different models, giving you various choices. This amazing appliance is specifically designed to ensure your culinary experiences are a breeze, from concocting delicious smoothies to creating gourmet sauces. However, like with any new gadget, the initial setup might seem a bit challenging. Fear not, for we’ve got your back! This guide will help you navigate through the basics of setting up your Ninja Blender and provide some useful tips to maximize its functionality. So, let’s get blending!
Please note that how you use your ninja blender determines its lifespan. To use your ninja blender:
Assemble it according to the user manual, Plug into a power source, Press the button on top to open the lid, Once it opens, add your ingredients, close the lid and choose your desired blending speed.
Ninja blenders use IQ technology to chop, process, blend or chop your ingredients well. To get the best from your blender, follow the 10 steps below.
Step One: Unpacking and Setting Up
Before you start blending, you’ll need to unpack your Ninja Blender and assemble it properly. Here are the steps:
Unboxing: Carefully open the box and lay out all the components. You should have the blender base, the pitcher, the blade assembly, the pitcher lid, and any additional accessories.
Assembly: Place the blender base on a flat, dry surface. Ensure the surface is clean and close to an electrical outlet.
Pitcher Placement: Pick up the pitcher for the blender and set it on the base. Make sure that the foundation and it are properly aligned.
Blade Installation: Next, take the blade assembly and place it into the pitcher. The blade assembly should fit down into the pitcher.
Lid Attachment: Finally, cover the pitcher with the lid. Make sure it snaps securely into place.
Step Two: Understanding The Control Panel
The control panel of your Ninja Blender is where the magic happens. It’s designed to be user-friendly, but understanding what each button does can help you get the most out of your blender.
Power Button: This is where you turn your blender on and off. Always make sure to turn the power off when you’re not using the blender.
Speed Control Buttons: These buttons allow you to adjust the speed of the blender. The options typically include low, medium, and high.
Pulse Button: The pulse function is great for when you want more control over your blending. It operates the blender at high speed as long as the button is held down.
Program Settings: Some models have pre-programmed settings for specific tasks like making smoothies or crushing ice.
Step Three: Safety Precautions
As with any kitchen appliance, safety is paramount when using your Ninja Blender. Here are some important guidelines to follow:
Always ensure the lid is securely attached before starting the blender.
Never remove the pitcher from the base while the blender is in operation.
Always turn off and unplug the blender when not in use.
Do not put your fingers or any utensils near the blades, especially while the blender is running.
Ensure the blender is not filled over its maximum capacity to prevent any spillage or damage.
Step Four: Select The Right Settings
Ninja blenders have different settings. So, you must choose the correct settings to achieve your desired results. For instance, if you want to chop or process your ingredients, you can select a pulse setting between 1, 2, or 3.
The blender settings are easy to use since the ninja blenders have clear labels for different working options. For instance, select the low or medium settings if you want to mix ingredients. But for more consistent and smoother results, you can use the high or max settings for better results.
After identifying your desired settings, press the specific blender button. Hold it until the ingredients reach the desired thickness consistency. Furthermore, you can add more liquids if your mixture is too thick.
Thanks to their intelligent AUTO-IQ technology, the ninja blenders can tailor the settings to provide optimal results. They provide unique blend patterns, pulse, and pauses depending on the ingredients.
Step Five: Basic Operation Steps
Now that you’re familiar with the setup and safety measures, let’s get to blending! Here’s how:
Add Ingredients: Place your ingredients into the pitcher. Remember, smaller pieces blend more efficiently.
Secure Lid: Make sure the lid is secured properly.
Power On: Press the power button to turn on the blender.
Choose Speed/Program: Use the control panel to select the desired speed or program.
Start Blending: Press the start button and let the blender work its magic!
Stop: Once you’re happy with the consistency, press the power button to stop blending.
Serve: Carefully remove the lid, pour out your delicious creation, and enjoy!
Step Six: Assemble the blender
Now that you have read the manufacturer’s instructions, let us jump to the next step. That is assembling the blender. Depending on your blender model, the manual will give you a thorough user guide to help you assemble it.
In most cases, you need to fix the pitcher to the base. Then the blade is onto the shaft. For the correct setting, ensure the pitcher aligns with the design and body of your blender model.
Otherwise, the blender will not start. To fix the blender well, you must twist the pitcher clockwise until it clicks. That way, you are sure it’s well set.
Once the blender jar is secure, it is now time for the next step; setting up the blender blades correctly. Set the blades directly above the blades’ gear. Meanwhile, it’s advisable to be gentle and careful to avoid injuries. That’s because the blender blades are very sharp and can lead to accidents if you are not careful.
You must hold the blades with care from the top to install them for the best results. The blender blades will only work with proper settings. Good thing; you don’t have to keep guessing if you have set it well.
Most models have an indicator to show when the settings are incorrect. You will see a red light flashing to indicate incorrect settings. If this happens, adjust the blades gently until the flushing stops.
Once you set the blade settings are correct, align the blender lid and the handle to start using. Ensure that the two are well aligned, then lock them into place. Also, ensure they align with the pitcher for it to fold down.
Step Seven: Plug In The Ninja Blender
Once you have assembled your ninja blender, plug it into a wall socket somewhere safe in your kitchen. Your blender uses power to run and will not run until you connect it to a power socket. Please check that the blender plug fits nicely into the socket for it to work.
Note: Before switching the plug, make sure that your materials are given properly into the blender.
Step Eight : Include Your Ingredients
It’s time to add your ingredients. Ninja blenders are incredibly flexible and are capable of making much more than just frozen fruit smoothies. You can chop hard ingredients, prepare salad dressings, make dips, and more.
Try experimenting with different substances without fear. The greatest method to get to know your Ninja blender is in the same way.
Whether using a pitcher or cup, just watch out that you don’t fill it too full. A “fill to here” line should be visible if you look closely. Avoid going overboard, as this may make it difficult for your Ninja blender to blend the ingredients.
Step Nine: Open The Blender Lid
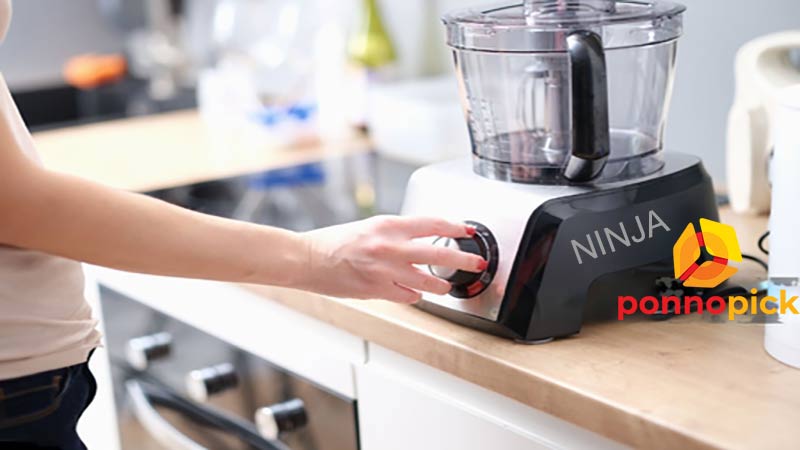
Regardless of your ninja blender model, it has a rectangular shape button on the top of the lid. Find the button and press down to open your blender. Add your desired ingredients, such as fruits, vegetables, protein powder, and liquids. Close the lid and adjust your blending speed using the knob on the blender base.
Choosing ninja blenders is the best choice you make. The blender is powerful to crash almost any ingredient you toss into the blender. Of course, except for rocks.
The blender is powerful to crash almost any ingredient you toss into the blender. Of course, except for rocks. But solids like Ice are not an exception. For this reason, you can be as creative as possible with your ingredients to make tasty smoothies and delicious sauces.
It is advisable to peel fruits that need peeling. Like pineapple, Oranges, and bananas before tossing them into the blender. But you don’t have to cut the fruits into small pieces, except if they are too large to fit into the blender jar. The blender is powerful enough to crush any fruit, regardless of size or shape.
Moreover, it’s advisable to leave hot ingredients out of your blender. Additionally, adding ice cubes can make your blender blades blunt. Therefore, bend ice cubes in moderation to maintain the blade’s sharpness for extended periods.
Step Ten: Cleaning and Maintenance
Keeping your Ninja Blender clean is essential for its longevity and performance. Here’s how to clean it:
After Each Use: After each use, rinse the pitcher, lid, and blade assembly with warm soapy water.
Deep Cleaning: After that use, you have to clean up. That’s fine, so we’ve talked about it below in the tips option.
Maintenance: Regularly check the condition of the blade assembly and seals. If you notice any damage or wear and tear, contact the manufacturer for replacement parts.
Tips For The Smooth Operation Of The Ninja Blender
Cleaning The Blender
It’s always good toclean the blender immediately after you finish using it. First, switch it off, then unplug it from the mains before you start cleaning.
For proper cleaning, use warm water in a big container and add the blades and lid immediately after use. The food remains will wash away immediately with ease. If you wait too long, it will stick and make cleaning difficult.
Clean all blender parts with care using your hands and a soft damp kitchen towel soaked in warm soapy water. Also, ensure to clean the kitchen surfaces for any spills. Additionally, store it somewhere safe and away from toddlers and kids.
Follow Starting Guide
Although your blender may seem complex, thestarting method is easy to understand once you get the hang of it.
The first step is to ensure you set up your blender well with the sprout and handle straight opposite. From there, lock the lid well. If not, the lid power button will keep blinking red, and your blender will not start. Lastly, ensure you fix the pitcher well to the base.
Follow Ice-Crushing Guide
Ice Crushing using a blender is an easy task with a Ninja blender. Their blades are powerful enough to shred even the most challenging ice cubes within minutes.
First, fill your blender jar with small batches of ice cubes. Avoid overfilling, as this will lead to a slow or ineffective crushing process. Next, press the correct settings to crush the ice cubes. You can use pulse settings or max settings for better results.
Enjoy crushed Ice in your milkshake, juice, smoothie, or margaritas. Remember, crashing Ice might make your blades blunt over time. But that doesn’t mean you need to buy a new one.Blade sharpening is possible to help get it working optimally.
User Guide
Read theblender user’s guide before proceeding with any activity. The user guide ensures your safety and other appliances when using the blender. Proper use of the blender prevents possible fires, electric shock, and other injuries, which may result due to improper use of the blender.
How to Start a Ninja Blender: Frequently Asked Questions
Why Is My Ninja Blender Blinking Red?
Your ninja blender will blink red if you have one or two parts that need proper attention—indicating that the blender parts are not in place, making the device insecure to use.
Why Is My Ninja Blender Not Turning On?
For safety purposes, ninja blenders do not turn on unless all parts are correctly in place. If yours is not switching on, check the pitcher and ensure it’s in place with the base. Next, ensure the handle and lid arrow aligns, then lock the handle for correct working. If that doesn’t work, check the blades to ensure they are well-fixed.
Why Is My Ninja Blender Power Button Blinking?
The ninja blender power button will blink to indicate something wrong with the device. Check if the lid and the base are correctly in place and whether the handle is well-locked.
How Do You Operate The Ninja Blender In Detail?
It’s easy to operate the Ninja blender. All you need is to follow the assembly instructions if you are yet to assemble it. Plug the blender into a wall power socket. After that,
Open the blender lid Add in your ingredients, Close it and align the pitcher & the handle as indicated in the user’s manual. Plug the blender in and press the power button. Select your preferred settings Run the blender until you achieve the consistency you want, with a pause if necessary When done, unplug the blender and clean it. And that’s all there is to it!
Can I Use A Ninja Blender To Blend Ice?
It is possible to blend ice with a Ninja blender. To crush ice, it’s crucial to use the proper setting and avoid adding too much at once to the pitcher. This will guarantee that the ice can be crushed by the blender efficiently and without overtaxing the engine.
Can I Use A Ninja Blender To Blend Hot Liquids?
Blending hot liquids in a Ninja blender is not advised since the steam and pressure from the hot liquid can pop the lid, potentially resulting in spills or burns. It is advisable to let heated liquids cool completely before combining them.
Final Comment
A Ninja blender works best as a blender food processor combo or a blender for protein shakes. That’s because of its robust nature.
In fact, it’s ideal as a commercial blender due to its large capacity and robust motor. But if you need a simple blender for baby food or a personal blender for smoothies, the Nutribullet blender is ideal.
I am working in a restaurant. One of the responsibilities is to monitor the Kitchen Appliances’ performance and inform the maintenance department. Sometimes, I work closely with the maintenance team. I have gained some knowledge of kitchen appliances from there and want to share it with you. I have a passion for explaining my understanding simply.
DISCLAIMER
Ponnopick intends to provide guidelines other than advice. We help buyers better understand the product.
INCOME DISCLOSURE
We have used affiliate links in the articles, and we may earn a commission through successful purchases from that links.