How To Use Ninja Blender: Step by Step
Step 1: Assemble your blender
The first step to using your Ninja is assembling it. Generally, a Ninja comes with two parts. The bottom is a motor base, and the top is a container. This container can be a pitcher or a single-serve cup.
First, unpack all the components from the box and place them on a flat and dry surface to begin the assembly. Then, place the blade attachment into the bottom of the cup or pitcher and lock it in place.
Next, attach the pitcher or single-serve cup to the motor base. Ensure the components are securely fastened before proceeding.
Step 2: Plug the motor base
Once you assemble your Ninja, connect the power cord to a wall outlet and switch the power on. Ensure you place it on a flat surface: for example, your kitchen countertop.
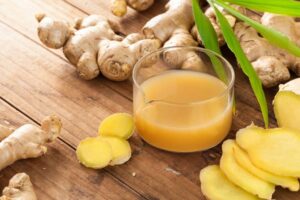
Step 3: Add your ingredients
After fully setting up your Ninja, you can add your ingredients. While you may get tempted to stuff your blender with various ingredients, do not overload it. Overfilling it can lead to inconsistent blending splashes and slowed blending. Instead, look for the max line on the pitcher and ensure your ingredients do not exceed it.
Additionally, add liquids before pouring chunky foods like nuts and seeds. Also, you can add soft ingredients like fruits or vegetables. However, it should be too much since it could cause splashing and spillages.
Step 4: Close the lid
Before starting the blending process, ensure the lid is appropriately and tightly closed. That helps keep the ingredients in and avoid any unwanted messes or mishaps.
The pitcher and single-serve cup both come with lids. For the pitcher, ensure that you twist the lid in a clockwise direction until it is securely in place. For the single-serve cup, press it down until you hear a clicking sound.
Step 5: Choose a blending setting.
Once you have added all the ingredients and secured the lid, you are ready to blend. However, you first need to choose your desired blending setting.
Low, medium, and high-speed settings
Different Ninjas come with various speed settings. They allow you to get different consistencies in your recipes. A low-speed level will enable you to mix; the medium speed is for blending, while the high speed is for chopping ice.
Pulse settings
Ninja blenders also come with a pulse setting. This setting allows it to work at its fastest speed as long as you press the start button. As soon as you release it, the blender stops.
Auto-IQ puree settings
Some special Ninja blenders come with auto-IQ puree settings. They allow you to set the desired time for it. That means it will blend the ingredients within the specified time, then turn off the blender.
Auto-IQ blend
Auto-IQ blend is a simple one-touch button program. It blends your ingredients quickly before automatically turning off. This short-run-time program is perfect for lighter foods such as leafy greens.
Auto-IQ ultra blend
Auto-IQ ultra blend is a similar program to Auto-IQ blend. However, this one has a prolonged automatic blend period. It’s ideal for blending tougher ingredients like ice, frozen fruit, nuts, and seeds.
Step 6: Pour your drink
Once the drink gets a complete blend, you can pour it into your desired glass or cup. However, remember your Ninja single-serve blender has super-sharp blades. They are excellent for blending but dangerous when mishandled. Therefore, take precautions when using it.
Your Ninja blender comes with a spout on the lid for use if your drink exceeds the filling line. The spout makes it easy to pour your drink without any mess or blade cuts which can often be severe.
Alternatively, remove the lid and stack the blades first. This precaution also reduces the chances of accidental cuts and messes.
Step 7: Clean your Ninja blender
Blender cleaning is a must after use. Such a measure helps avoid food particles sticking in the jar. It also helps prevent mold and bacteria growth. Plus, it ensures it’s ready for use whenever you need it.
To clean your Ninja blender, you will need to:
Firstly, fill the pitcher with warm water and a few drops of dish soap.
Next, let it run for about 30 seconds.
Afterward, ensure you rinse it and its parts thoroughly with clean water.
What you do with a Ninja blender
With a Ninja blender, you can make almost anything. From smoothies and milkshakes to soups, sauces, dips, and even frozen desserts. So put yours to work. Here are a few ideas.
1. Smoothies
The Ninja is the ideal blender for smoothies. Its powerful blades quickly and easily break down fruits, vegetables, nuts, and seeds. You can make anything from a classic fruit to a green smoothie packed with healthy greens.
Mix one cup of your preferred liquid base with half a cup of small-cut fruit, greens, and veggies. Add yogurt or any boosters to your mixture and blend until smooth.
2. Milkshakes
You can make delicious homemade milkshakes using your Ninja blender in no time. Add two cups of your favorite ice cream and a half cup of milk to the jar.
Add crushed cookies, nuts, or marshmallows for an extra special touch. Finally, blend until the milkshake reaches your desired consistency.
3. Ice cream
Yes, you can make ice cream with your Ninja blender. You only need creativity and simple ingredients like yogurt, milk, or cream. Start by adding your liquid base (cream) into the jar. Next, add your site flavor and sweetener of choice, and blend until it’s smooth.
Once you achieve a smooth consistency, pour the mixture into a container. Next, wrap it with plastic, and put it in a freezer for 4-6 hours. Remove, add toppings, and freeze for 1-2 hours.
4. Juices
Making juices using blenders is typically the main reason people buy one. Ninja blenders come with a juicer combo. All you need is to add your chopped fruits and veggies into the jar. It could be cucumbers, apples, or strawberries. Then, blend for a few seconds and strain the mixture with a fine mesh strainer.
5. Slushies
Making slushies is another excellent way to use your Ninja blender. You only need a few fruits, juice, and ice. Simply add the ice cubes, fruit juice, sweetener, and powder to the jar. Then blend at high speed until it reaches a smooth, slushy consistency.
Pour your mixture into a cup and enjoy. You can also add ice for a frother texture.
6. Hummus
Your Ninja blender can make delicious dips and sauces like hummus and pesto. Add two cups of cooked chickpeas, 1/2 cup of tahini sauce, clove garlic, and Kosher salt when making hummus. Then pour 2-3 tablespoons of olive oil, chickpea liquid reserved, and a squeeze of lemon juice. Blend until you get your desired consistency and serve.
7. Coffee grinder
Your Ninja blender also functions as an excellent coffee grinder. Just add the beans into the cup, turn it on and have it at full blast for 30 seconds on average.
Alternatively, we recommend using the pulse setting for the single-serve cup. Using pulse blend mode about 12 times will grind coffee beans to a fine powder. This measure will get you that coarse grind you desired for the French press.
8. Bread crumbs
Make bread crumbs with your Ninja blender by first slicing the bread into small chunks. After that, add them to the jar alongside your preferred herbs and spices. Once that’s done, close the jar and pulse until the desired texture gets archived.
9. Baby food
A standard Ninja blender is a multifunctional appliance. That means it can work well as a blender for baby food.
Before the blending process, ensure you cook hard ingredients like carrots. Add to the jar steamed vegetables and fruits cut in half or quarters.
Top it all with a bit of milk or juice. Such liquids will give you a smooth consistency. Then, puree in high settings until the desired textures.
Blend for longer while adding more liquid periodically to get a smoother puree. Cool the food and serve.
10. Soup
You can also make delicious, healthy soups with your Ninja blender. Your ingredients will vary depending on your desired soup. Try this recipe.
Pour warm broth (not boiling) into the jar. Add the ingredients like green onion, thawed peas, salt, avocado, and pepper. Secure the cover, and begin blending slowly. Blend for 5 minutes, gradually increasing the speed to achieve your desired texture.
Pour the contents into a pot, heat again, and serve.
11. Chopper
Chopping ingredients such as vegetables is a straightforward task for a Ninja blender. Add your veggies to the jar, secure the lid, and turn it on.
Puree a few times until you get your desired texture. It’s perfect for making salsa or guacamole.
12. Puree
Ninja blenders are among the best puree makers available. All you need to do is a base liquid to the jar to help achieve the ideal thickness. Next, add chopped fruit and cooked vegetables. After that, secure the lid and blend.
If your resulting puree is too thick, add more liquid. If too thin, add food. Slowly adding more liquid or food while blending will allow you to achieve the ideal texture.
13. Powder extract
Ninja blender is a game changer for making homemade powder extracts. It allows you to extract powder from tough, leafy, and fibrous vegetables and fruits. It can also flour things like seeds and stems.
Add ingredients to the jar to make powder extract, and secure the lid. Start by blending at a low speed and gradually increase its speed until you get your desired texture. Place the powder extract in an airtight container and store it away from heat and moisture.
How to use a Ninja blender
Ninja blenders came in different models for different applications. For example, there is a one suited as a blender for crushing ice, a blender for acai, and a blender for protein shakes. The best depends on your needs.
What are the procedures of using a Ninja blender as a food processor
The Ninja blender is the perfect blender food processor combo. You can quickly chop, grind, and puree your food with it. Whether you want to make smoothies, soups or breadcrumbs, sauces, or dips, it can handle all your tasks.
To use your new Ninja blender as a food processor, do the following:
Firstly, begin by assembling it.
Next, add your ingredients and close the lid tightly.
Finally, select your desired setting from the control panel. Wait for your food to get processed according to your selection.
What are the procedures of using a Ninja blender as a juicer
The Ninja blender also acts as an efficient juicer. However, it’s more work than a blender-juicer combo. It allows you to extract juice from your favorite fruits and vegetables easily.
To use your new Ninja blender as a juicer:
- Add chopped pieces of fruits and veggies into the jar.
- Start by adding lighter ingredients like bananas to ensure a smooth juicing process.
- If you want it cold, add some ice cubes to the mixture and secure the lid.
Blend on the smoothie setting until you achieve your desired consistency. After that, strain the juice using a nut milk bag.
How to use a Ninja professional blender 1000 watts
The Ninja BL610 Professional Blender 1000 Watts is powerful with impressive capabilities. It allows you to blend, puree, chop, emulsify, and even easily make smoothies.
To use the Ninja Professional Blender 1000 Watts (BL610):
First, begin by setting it up, including placing the blades in the pitcher. Secondly, add your ingredients to the jar and mount it onto the power base. With that done, please turn it on, press the low-speed button, and progress to the medium and high.
Next, wait for your desired consistency. Lastly, pour the contents into a glass and enjoy.
How to use Ninja 1100-watt professional blender
The Ninja BL660 Professional Blender 1100 Watts is an even more powerful blender. It has a wide range of features. It comes with two single-serve cups and one pitcher, and blades.
To use the Ninja Professional Blender 1100 Watts (BL660):
First, start by setting it up. That includes placing the blades inside the pitcher. Secondly, plug the motor base into a power outlet ( do not turn it on yet). Next, add ingredients to the jar (do not exceed the max line) and secure the lid.
After that, mount the jar onto the power base. Then, please turn it on and start at the lowest speed, progressively moving to the highest. Please wait until it achieves your desired consistency. Lastly, pour contents into a pot or glass when ready and enjoy.
How to use ninja food power blender
The Ninja SS351 Foodi Power Blender is a one-of-a-kind food crusher. It has numerous features and impressive capabilities. This powerful appliance allows you to blend, puree, and chop ingredients quickly.
To use the Ninja Foodi Power Blender:
Firsty, set it up by placing it on a flat surface and plugging in the base to a power outlet. Secondly, dismount the pitcher or cup, add ingredients and close the lid. Thirdly, mount the jar to the power base and turn it on.
Next, choose a setting from the control panel that best suits your needs. After that, begin blending and wait for your desired consistency. Lastly, when ready, pour the contents into a pot or glass and enjoy!
How to use ninja professional plus blender with auto-IQ
The Ninja BN701 Professional Plus Blender with Auto-IQ is a unique home appliance. The Auto IQ technology allows you to blend, puree, and chop ingredients effortlessly.
To use the Ninja Professional Plus Blender with Auto-IQ:
First, begin by setting it up (place it on a dry flat surface and plug it into a power outlet). Secondly, dismount the single-serve cup and add ingredients, never crossing the max line. Since you will inverse the cup, add hard foods at the bottom.
Next, secure the jar with a blade lid and mount it on the power base. From there, please turn it on and choose one of the two Auto-IQ settings. After that, please press the button until it reaches the desired consistency.
Lastly, pour it into a glass and enjoy! Remember, blender cleaning is a must.
How to use a Ninja pulse blender
The Ninja pulse blender is among the leading blender brands in the market. It offers superior performance and easy-to-use features.
These qualities make it an ideal blender for crushing ice. However, to get the decided results of your recipes, you need to know the tips and tricks.
Here is how to use a Ninja pulse blender.
First, add your ice to the jar. Next, place the lid and let it lock. Unlike other models, the pulse has a handle that helps you blend. Press this handle at the back of the lid while momentarily releasing it.
Do that for a few seconds to get finer snow. From there, stop blending and serve your final blend to any drinks. You can do that with other recipes, such as margaritas.
Remember, ice-crushing using a blender can blunt the blades. It will need blade sharpening from time to time.
Final Comment
Using a Ninja blender is an easy and fast way to make delicious and healthy food. You can quickly have delicious smoothies, soups, and more ready to enjoy with a few simple steps. However, knowing your specific model’s tips and tricks will help you get the best results.
Some Helpful Questions and Answers
What is special about Ninja blender?
Unlike regular mixers, the Ninja blender has a built-in “Twist Tamper. You don’t have to spend extra to buy one.
How do you use the Ninja power blender and processor?
Always start at a low speed and increase to the highest as the blending continues. Remember to choose your preferred mode depending on what you want to make. Then, after the timer is over, remove the container or the single-serve cup and serve.
What is the first thing you should consider when using a blender?
The first step when using a blender is to set it up. This process includes placing it onto a flat surface and plugging it into a power source. After that, you can begin adding ingredients to the jar before blending.